NTE Gear System Complete Guide: All 12 Cartridge Sets + Module Mechanics + 17-Character BiS Endgame Builds
Deep dive into the Gear (Cartridge + Module) system in Neverness to Everness (NTE) — all 12 set bonuses, the "what you see is what you get" substat mechanic, the 6 Rabbit Hole domain mappings, best builds per character, and the F2P endgame route.
Published: 2026/05/24
Key takeaway: Gear (Cartridge) is NTE’s set-equipment system, made up of the Cartridge + Module. Version 1.0 has 12 sets total (6 elemental + 6 universal), and substats are “what you see is what you get” and permanently fixed (this is NTE’s biggest selling point for artifact players). Farming location: the Rabbit Hole domain (Cape Square, unlocked at Hunter Lv 10), whose 6 nodes map to the 12 sets. F2P new-player must-grab: the free Lost Radiance from Exploration Guide Lv 8; the 3 universal staples: Lost Radiance, Shadow Creed, and Fireflies and the Forest.
Arcs are weapons, Gear is set equipment — together they form the two great equipment systems of NTE character progression. What makes the Gear system most special is its “what you see is what you get” design — substats are permanently fixed, completely retiring the pain of re-rolling artifacts. This article organizes all of Gear’s mechanics, sets, domains, builds, and new-player routes in one place.
1. What Is Gear (Cartridge + Module)
A Two-Part System
NTE’s “Gear” is not a simple five-piece set; it’s composed of two parts:
- Cartridge: defines the “script / set type,” with a 4×5 = 20-cell grid
- Module: a puzzle piece (in 2-, 3-, and 4-cell shapes) that fills the grid like Tetris
Filling in enough Modules activates the set bonus:
| Condition | Activated Effect |
|---|---|
| Fill in 2 Modules of the matching shape | 2-piece (Epic) bonus |
| Fill in 4 Modules of the matching shape | 4-piece (Legendary / endgame) bonus |
Module Shape Categories
| Type | Cells | Shape | Traits |
|---|---|---|---|
| Type Ⅱ | 2 cells | Horizontal/vertical bar | Smallest, used to fill gaps, lower stat values |
| Type Ⅲ | 3 cells | L-shape / straight (vertical/horizontal) | Medium, preferred by most characters |
| Type Ⅳ | 4 cells | Square / long bar | Largest, highest stats but hardest to place |
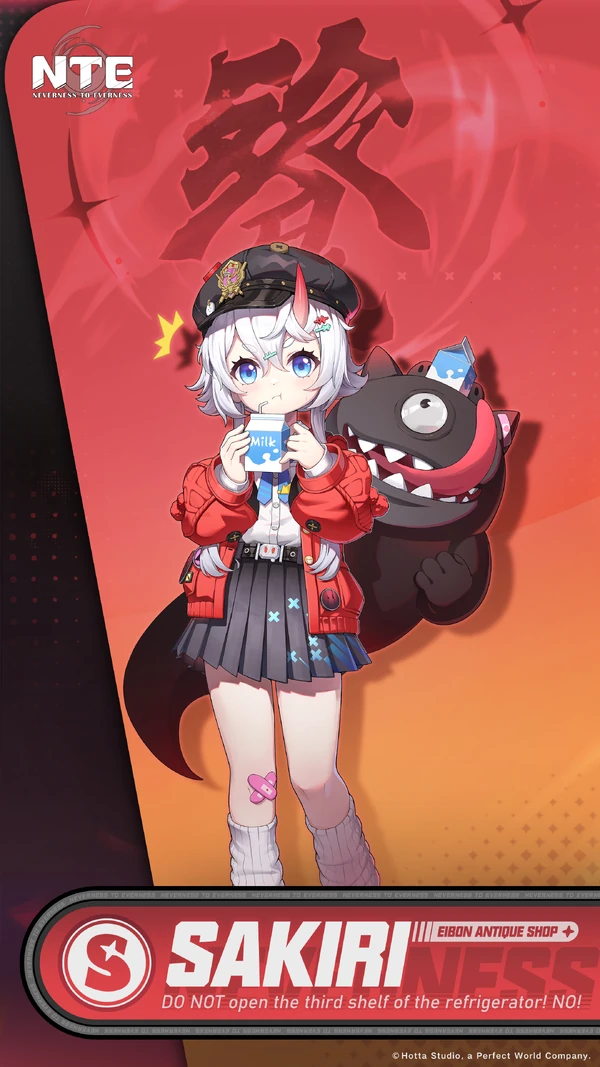
Character shape preference: each character has a “preferred Module type,” and placing the preferred type grants an extra stat bonus. For example: Sakiri prefers Type Ⅲ, gaining 9% psychokinetic damage per Type Ⅲ piece. Type Ⅱ-specialized characters: Nanally, Jiuyuan, Fadia.
2. The Core Difference vs. Artifacts / Drive Discs
This section is the Gear system’s most important selling point:
| NTE Gear | Genshin artifacts / ZZZ Drive Discs | |
|---|---|---|
| Substats | All visible from the start, permanently fixed ✅ | Random + random reinforcement on upgrade ❌ |
| Upgrade pain | None (what you see is what you get) | Enormous (re-roll loop) |
| Can you re-roll substats? | ❌ No | ❌ No (but with random reinforcement) |
| Pity system | ✅ Weekly shop pity of 3 orange Modules | Less generous |
| F2P endgame speed | Far faster | Slow |
| Leveling the wrong character | Most materials refunded on dismantle | Large loss |
For players tired of the random substat re-rolling of artifacts, this is NTE’s biggest draw.
3. The Complete 12-Set List
A. The Six Elemental Sets (One Per Element)
| Set (EN) | 2-Piece | 4-Piece | Best Characters |
|---|---|---|---|
| Lost Radiance | Cosmos DMG +10% | For 20s after the Ultimate, damage ignores 25% DEF (does not stack) | Esper Zero, Hotori, Chiz, Cosmos Main DPS / Sub-DPS |
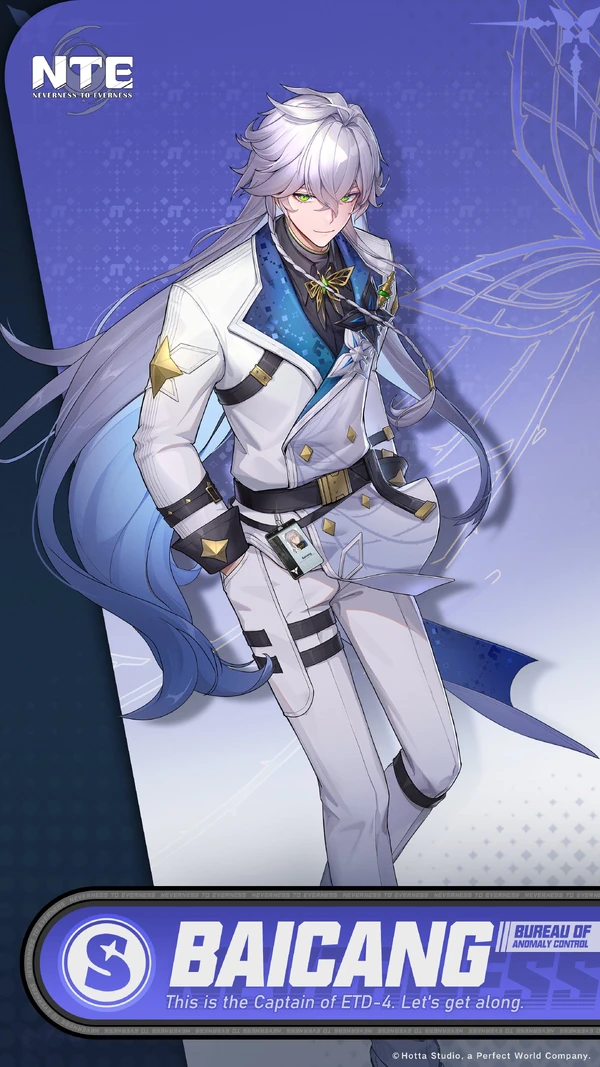
| Crimson: Twin Butterflies | Incantation DMG +10% | When the team deals Incantation damage to enemies, self ATK +6% (up to 6 stacks = +36%), each lasting 10s | Baicang, Edgar (damage builds) |
| Fireflies and the Forest | HP DMG +10% | When the team deals HP damage to enemies, self crit DMG +8% (up to 7 stacks = +56%), works from the backline too | Nanally, Mint, Jiuyuan, Haniel (damage build) |
| Diabolos | Chaos DMG +10% | Ignores 12% Chaos RES; for 20s after triggering a Fission / Burn reaction, ignores 24% Chaos RES | Lacrimosa (1.1), Chaos DPS |
| Devil’s Blood: Curse | Psyche DMG +10% | DMG +18%; raised to +36% when attacking targets in a Fission / Corrosion state | Fadia (damage build), Aurelia |
| Street Boxer | Karma DMG +10% | Crit rate +14%; an extra +14% (for +28% total) when the team triggers Soul Drain or Corrosion, for 20s | Hathor, Skia, Karma Main DPS |
B. The Six Universal Sets (No Element Restriction)
| Set (EN) | 2-Piece | 4-Piece | Best Characters |
|---|---|---|---|
| Kingdom’s Guard | DEF +15% | Shield value +20% | Kuili, all shield supports |
| Quiet Manor | Mental DMG +10% | Each basic attack gives Mental DMG +12% (up to 3 stacks, +46% total), each lasting 6s | Mental DMG characters (harder to maintain) |
| Shadow Creed | ATK +10% | For 20s after casting a Skill, ATK +25% | Universal Sub-DPS / damage supports (all-purpose) |
| Tiny Big Adventure | HP +10% | Each time you take damage, max HP +4% (up to 10 stacks = +40%); the Ultimate grants all 10 stacks instantly | Fadia (HP-sharing mechanic) |
| Thea’s Night Tavern | HP +10% | Healing +20% | Edgar, future healers |
| Speedy Hedgehog | Energy recharge +12% | After casting the Ultimate, whole-team ATK +15% (20s) | Sakiri, Haniel, all energy supports |
4. Rarity, Main Stat, Substats
Rarity
- S-tier (orange): Legendary, full 4-piece bonus → the main farming target
- A-tier (purple): Epic, usable as a transitional piece
- B-tier and below (blue/green): early-game transitional; all can be dismantled after Level 30
Main Stat (1 per Cartridge)
Candidates: Crit rate / Crit DMG / Elemental DMG% / ATK% / HP% / DEF% / Healing bonus / Energy recharge
Priority by role:
| Role | Main Stat Priority |
|---|---|
| Pure burst DPS | Crit DMG / Elemental DMG% |
| ATK-type DPS | ATK% / Elemental DMG% |
| Support | Energy recharge |
| Healer | Healing bonus / HP% |
| Shielder | DEF% |
Substats (4 per Cartridge, permanently fixed)
Candidates: Crit rate, Crit DMG, ATK%, flat ATK, DEF%, HP%, generic DMG%, elemental RES, etc.
Reinforcement rules:
- Reinforcing every +5 levels “activates” one substat (+5, +10, +15, +20 each activate one)
- The substat candidates and their values are locked in the moment you obtain the piece and never change
Substat Priority for DPS Characters
Main stat → Elemental DMG% > Crit DMG > ATK% Substats → Double crit (crit rate + crit DMG) > Elemental DMG% > ATK% > generic DMG%
Push crit rate to 60–70%, then stack crit DMG.
5. Farming Location: The Rabbit Hole Domain
Domain Basics
| Item | Details |
|---|---|
| Location | Right side of Cape Square, south of the Midas Arc Workshop |
| Unlock | Hunter Level 10 |
| Stamina cost per run | 40 stamina (Character Pixels) |
| Simultaneous drops | Cartridges, manhole reinforcement materials, copper/silver/gold Radish coins, Hunter EXP |
⭐ The 6 Nodes and Their Sets (Key Mapping Table)
| Node | Corresponding 2 Sets |
|---|---|
| Clock Tricks | Lost Radiance + Diabolos |
| Sculpture Gallery | Street Boxer + Devil’s Blood: Curse |
| Latitude Loom | Fireflies and the Forest + Crimson: Twin Butterflies |
| Defend the Radish | Kingdom’s Guard + (data TBD) |
| Mental Map | Speedy Hedgehog + Quiet Manor |
| Night of the Rails | Shadow Creed + Tiny Big Adventure |
Each node always drops 2 sets (1 elemental + 1 universal), so picking the right node is the first step to farming the right set.
Domain Difficulty and Drop Rates
- Normal: blue/purple Modules (transitional)
- Hard: purple/orange Modules
- Rift (high difficulty, unlocks at Level 30): high chance of orange Modules, the top farming target
⚠ Don’t farm heavily before Hunter Level 25; efficiency is highest after entering Rift at Level 30.
6. Reinforcement Mechanics + Acquiring Modules
Reinforcement Rules
- Cartridge level cap is +20 (synced with Modules)
- Every +5 levels unlocks the effective value of one substat
- Reinforcement materials: Manhole (three tiers) + Funds + beetle coins
The Rewind System (Acquiring Modules)
Access via: Character → Console → Gear → “Rewind” in the bottom-left corner
| Rewind Type | Cost | Output |
|---|---|---|
| Normal Rewind | 80 Radish coins / pull | Blue/purple Modules |
| Advanced Rewind | 200 Radish coins / pull | Purple/orange, purple guaranteed |
| Choose-Shape | Higher cost | +50% cumulative when pulling the same shape repeatedly |
⭐ Guaranteed Shop Pity (Key to F2P Endgame)
- Harmony Workshop Shop: can buy 1 orange Module per week
- Funds Shop: limited to 2 orange Modules per week
- → 3 guaranteed orange Modules per week total
This is the key reason NTE is far faster than artifacts — F2P players have a clear, defined endgame timeline.
7. Recommended Builds Per Character
S-Tier Characters (Mainstream Meta Lineups)
| Character | Main Set (4) | Secondary Set (2+2) | Main Stat Priority |
|---|---|---|---|
| Esper Zero (protagonist) | Lost Radiance 4 | Shadow Creed 2 + Lost Radiance 2 | Crit rate → Cosmos DMG% |
| Hotori / Firebird | Lost Radiance 4 | Lost Radiance 2 + Shadow Creed 2 | Crit DMG → Cosmos DMG% |
| Chiz | Lost Radiance 4 | Lost Radiance 2 + Fireflies and the Forest 2 | Crit DMG → Cosmos DMG% |
| Baicang | Crimson: Twin Butterflies 4 | Crimson 2 + Shadow Creed 2 | Crit DMG → Incantation DMG% |
| Nanally | Fireflies and the Forest 4 | Fireflies 2 + Shadow Creed 2 | HP DMG% → Crit DMG |
| Mint | Fireflies and the Forest 4 | Fireflies 2 + Shadow Creed 2 | HP DMG% → Crit DMG |
| Jiuyuan | Fireflies and the Forest 4 | Fireflies 2 + Shadow Creed 2 | Crit DMG → HP DMG% |
| Hathor | Street Boxer 4 | Street Boxer 2 + Shadow Creed 2 | Crit DMG → Karma DMG% |
| Skia | Street Boxer 4 | Street Boxer 2 + Shadow Creed 2 | Crit DMG → Karma DMG% |
| Fadia (damage) | Devil’s Blood: Curse 4 | Devil’s Blood 2 + Shadow Creed 2 | Psyche DMG% |
| Fadia (HP-sharing) | Tiny Big Adventure 4 | Tiny Big Adventure 2 + Kingdom’s Guard 2 | HP% |
| Aurelia | Devil’s Blood: Curse 4 | Devil’s Blood 2 + Shadow Creed 2 | Crit DMG → Psyche DMG% |
| Lacrimosa (1.1) | Diabolos 4 | Diabolos 2 + Shadow Creed 2 | Crit DMG → Chaos DMG% |
| Sakiri | Speedy Hedgehog 4 (4× Type Ⅲ) | Speedy Hedgehog 2 + Kingdom’s Guard 2 | Energy recharge |
| Haniel | Speedy Hedgehog 4 | Speedy Hedgehog 2 + Fireflies 2 | Energy recharge |
| Edgar | Thea’s Night Tavern 4 | Thea’s 2 + Kingdom’s Guard 2 | Healing bonus / HP% |
| Kuili | Kingdom’s Guard 4 (4× Type Ⅲ, +12% DEF each) | Kingdom’s Guard 2 + Crimson 2 (Crimson 4 for DoT builds) | DEF% / Energy recharge |
A-Tier Characters (Daffodill, Chiz, etc.)
These usually serve as transitional picks or specific Anima-ring triggers; the recommendation is to follow the same-element Main DPS set. The detailed build data has not yet been fully established by the community — defer to in-game data.
8. New-Player / F2P Fast-Track Route
Week 1 Priorities
- ❌ Don’t grind Cartridges hard before Hunter Level 25 (drop rates are too poor — pure stamina waste)
- Stamina priority order: Main DPS EXP → Main DPS ascension → City Tycoon unlock → Sub-DPS → supports → skill materials → Funds
- Gear only needs to be “good enough for your Main DPS”; in the early game, run exploration quests first to scrape together some A-tier pieces to make do
- ⭐ Exploration Guide Level 8: gives you a free Lost Radiance legendary Cartridge + a 4-piece activation Module set — be sure to grab it
- Once you reach Level 30 and unlock the Rabbit Hole “Rift” difficulty, start long-term farming
The 3 All-Purpose Sets (Farm First)
- Shadow Creed — usable as a 2-piece by almost every Sub-DPS / damage build, extremely versatile
- Lost Radiance — used by Esper Zero, Hotori, Chiz, and all Cosmos Main DPS, and one is given free at launch
- Fireflies and the Forest — Nanally, Mint, and Jiuyuan all benefit at once, so a full farm can be shared across three characters
Can Wait Until Later
- Quiet Manor: stacks are hard to maintain (only 6s)
- Kingdom’s Guard: only needed by shield characters like Kuili
- Thea’s Night Tavern: only needed by Edgar / healers
- Tiny Big Adventure: exclusive to Fadia’s HP-sharing build
The “Auto-Equip” Trap
⚠ There is an official “Auto-Equip” button, but the community broadly recommends not using it — it won’t prioritize placing the right shapes to trigger the 4-piece bonus. You must place pieces manually until “all 4 correct Modules are filled in” to activate the legendary effect.
9. The “NTE Flavor” of the Gear System (Summary)
Compared with Genshin artifacts / ZZZ Drive Discs, the Gear system’s exclusive selling points:
- ✅ “What you see is what you get” substats — a core draw for players tired of re-rolling
- ✅ Puzzle-grid design — more strategic than the usual “five-piece set,” and visually expressed
- ✅ Guaranteed shop pity — 3 guaranteed orange Modules per week, making F2P endgame far faster than artifacts
- ✅ First-week Exploration Lv 8 guaranteed Lost Radiance — a launch bonus the community calls “a loss if you don’t grab it”
- ❌ No substat re-rolling — but because substats are decided from the start, this is actually an advantage
Related Guides
- Arc System Complete Guide — the weapon system (Gear’s sister article)
- Signature Arcs Complete Guide — each character’s BiS weapon
- Equipment System Breakdown: Arcs and Gear — overview
- NTE Boss Bestiary — which Bosses correspond to the set materials you want to farm
- Affinities and Anima Reactions — elemental sets need their matching elemental reactions
FAQ
What is Gear, and how is it different from Arcs? +
Gear (Cartridge) is the character set-equipment system, made up of two parts: the Cartridge + the Module. The Cartridge defines the "set type" (it has a 4×5 = 20-cell grid), and Modules slot into the grid like Tetris pieces to activate effects. Arcs are weapons, Gear is the set equipment — the two systems are completely separate. Fill in 2 Modules of the matching shape → 2-piece set bonus; 4 Modules → 4-piece set bonus (endgame).
What is the single biggest difference between NTE Gear and Genshin artifacts? +
"Substats are all visible from the very start, and are permanently fixed"! Unlike the random upgrades of artifacts, what you see is what you get — the moment you pick a piece up you can see whether its substats are good and just use it, with none of the painful substat-grinding loop. The level cap is +20, and every +5 levels "activates" the value of one substat, but the substats themselves never change. This is NTE's core selling point for players burned out on artifacts.
Of the 12 sets, which should a new player farm first? +
Three sets have the widest use: (1) Shadow Creed — ATK +10% / +25%, usable as a 2-piece by almost every Sub-DPS / damage build; (2) Lost Radiance — used by Esper Zero, Hotori, Chiz, and every Cosmos Main DPS, and the Exploration Guide Lv 8 gives you one for free (be sure to grab it first); (3) Fireflies and the Forest — shared by Nanally, Mint, and Jiuyuan. Don't grind hard before Hunter Level 25; wait until Level 30 unlocks the "Rift" difficulty, then farm heavily.
Where is the Rabbit Hole domain, and how do I pick the right node? +
Location: right side of Cape Square, south of the Midas Arc Workshop; unlock requirement is Hunter Level 10. There are 6 nodes, and each node always drops 2 sets (1 elemental + 1 universal). The mapping: Clock Tricks (Lost Radiance + Diabolos), Sculpture Gallery (Street Boxer + Devil's Blood: Curse), Latitude Loom (Fireflies and the Forest + Crimson: Twin Butterflies), Mental Map (Speedy Hedgehog + Quiet Manor), Night of the Rails (Shadow Creed + Tiny Big Adventure), Defend the Radish (Kingdom's Guard + one other set).
Can I re-roll Gear substats? What if I leveled the wrong character's piece? +
You cannot re-roll substats, and you cannot re-draw substats — substats are permanently fixed and decided the moment you obtain the piece. Don't worry about leveling the wrong character's piece — when you dismantle it, most materials are refunded and can be reassigned to another character. There is an official "Auto-Equip" button, but the community broadly recommends not using it — it won't prioritize placing the right shapes to trigger the 4-piece bonus; you must manually place pieces until "all 4 correct Modules are filled in" before the legendary effect activates.
Gear data compiled from public sources including Game8, GameWith, Kaiden.gg, Mobalytics, Prydwen Institute, NTE Guide, ZeroLuck, AllThings.How, Bahamut, Mobile01, 4Gamers, LDPlayer, Entertainment Taxi, HN News, Gamersky, 17173, and others. Some set names (e.g., Lost Radiance vs. Lost Glow, Baicang vs. Baizang) vary slightly between sources; defer to in-game text. New sets from 1.1 “Dream-Wandering Corridor” will be added once they go live.
Related articles
Neverness to Everness (NTE) Equipment Systems Explained: Arc, Gear & Substat (Affix) Priority
NTE Signature Arcs (Signature Weapons) Full Guide: Should You Pull, Per Character + 14 Free BiS Picks