Nanally Build Guide: 1.0 Launch Limited T0 Main DPS, Ready-Ready Signature Arc & Synthesis Core
Complete build guide for Neverness to Everness (NTE) S-rank limited Nanally Collins — 1.0 launch Pickup T0 Main DPS, First Generation authority, anti-gravity wall-running, Ready-Ready signature Arc, Fireflies & Forest, Type II driver block specialization.
Published: 2026/05/24
Key answer: Nanally Collins is a 1.0 launch limited T0 Main DPS — element Anima, Arc type Plasma, JP CV Ayana Taketatsu, with a “First Generation big-sister boss” backstory from the Bridgehead streets. Strongly recommended (version ceiling + anti-gravity traversal experience + beginner-friendly). Her signature Arc Ready-Ready offers dual-crit + three stacking bonuses; pair it with the Fireflies & Forest 4-piece + Type II driver block specialization, recommended team “Wave team: Nanally + Sakiri + Jiuyuan + Esper Zero”. 0 Eidolons is already strong; signature Arc > Eidolons.
Red-haired cat-ears, the Bridgehead “First Generation big-sister boss”, anti-gravity wall-running — Nanally is the 1.0 launch limited T0 Main DPS, dubbed by the community the “beta wheelchair / money-printing machine”. This guide lays out her mechanics, gear, Eidolons, recommended teams, and build path all in one place.
1. Character Basics
| Item | Details |
|---|---|
| Full name | Nanally Collins |
| Nicknames | First Generation / big-sister boss / street dream-chaser / red-haired cat-ears |
| Rarity | S-rank limited (1.0 launch Pickup) |
| Element | Anima |
| Arc type | Plasma |
| Role | Main DPS / burst output (joint-strike type) |
| Team role | Version T0 Main DPS, core output engine |
| Affiliation | Antique shop “Eborn” |
| Birthday | August 20 |
| JP CV | Ayana Taketatsu (Kena in “Eromanga”, Suguha Kirigaya in “Sword Art Online”) |
| CN CV | Song Yuanyuan |
| Backstory | Originally the representative of a small local street gang in Bridgehead, calling herself the “First Generation Collins”. Later she stayed to work off her debt at the “Eborn Antique Shop”, with a dream of reviving the Collins family. Sunny, hot-blooded, loyal and big-hearted by nature. |
| Ability codename | ”Genius First Generation – Reversed Earth” |
| Banner | First Generation Pick-up limited banner (1.0 first half 2026/04/29 – 2026/05/13) |
2. Skill Kit
Basic Attack [Collins Secret Technique]
- 5-hit rapid claw combo, smooth and uninterrupted
- The final hit applies a stun effect
- Enhanced while in the “First Generation authority” state
Shift [Collins Awoo Art]
- 5 instances of AoE Anima damage
- ⭐ Enters the “First Generation authority” state for about 12 seconds (extended to 15 seconds at Eidolon 6)
- This state increases Crit DMG by about 30%, and unlocks anti-gravity wall-running / surface-walking!
Ultimate [Collins Ultimate Art]
- Deals 7 hits of Anima AoE damage to surrounding enemies
- ⭐ Summons the Underboss to join the battle
- The Underboss coordinates with each of Nanally’s attacks, adding “joint-strike” follow-up Anima damage
Assist [Justice From Above / Fair Fighting Judgment]
- A single powerful Anima hit
- The other support effect “More Than One Heart’s Worth of Passion” fires 10 shots in succession
Passive 1 [Absolute Fair Fighting Judgment]
- Every time an ally triggers an elemental reaction, Nanally triggers a 60% ATK follow-up (once every 2 seconds)
Passive 2 [More Than One Heart’s Worth of Passion]
- Raises the Synthesis seed cap from 4 to 6, a notable damage boost in Synthesis-reaction teams
Core Rotation
E (Awoo Art) → Basic Attack ×2-3 → Q (Ultimate, summon Underboss) → Basic Attack burst loop → E to refresh authoritySustaining Basic Attacks during the authority window yields the highest returns; after Q triggers, the Underboss adds follow-up damage to each Basic Attack hit.
3. Eidolon (Awakening) Priority
NTE’s awakening system has a unique advantage: you can freely switch between already-unlocked awakening effects at any time, with no materials and no cooldown. The 3rd awakening unlocks the first resonance effect, the 6th unlocks the second.
| Eidolon | Name | Effect summary | Priority |
|---|---|---|---|
| A1 | Gang First Founded | Each joint-strike restores 2.5 Ultimate energy (once per second), greatly speeding up the Q rotation | ⭐⭐⭐⭐⭐ Top pick |
| A2 | Second Generation Follows | Underboss field-time extended by 3 seconds | ⭐⭐ |
| A3 | Call Me Big Sister | While in authority, each instance of damage adds a 50% ATK Anima follow-up (once per second) | ⭐⭐⭐⭐⭐ |
| A4 | Not a Troublemaker | Underboss damage increased by 30% (every follow-up benefits from this bonus) | ⭐⭐⭐⭐ |
| A5 | Underlings Everywhere | Each follow-up stacks ATK +2%, up to +20% ATK | ⭐⭐⭐⭐ |
| A6 | Because We’re Family | First Generation authority duration 12s → 15s (20s out of combat) | ⭐⭐⭐ |
Recommended awakening order: A1 ≧ A3 > A5 ≧ A4 > A6 > A2
0-Eidolon Viable vs Eidolon-Required
- ⭐ 0 Eidolon + signature Arc > 6 Eidolons without the signature Arc (community consensus)
- 0 Eidolons can already clear all beta content — traversal, abyss, and open world are all handled
- Investment order: secure 0 Eidolons first → pull the signature Arc → then chase Eidolons
4. Best Gear
⭐ Arc: Ready-Ready (S-rank limited BiS)
| Attribute | Value |
|---|---|
| Base ATK | 37 (R1) / fully leveled at Lv70 |
| Sub-stat | Crit Rate (24% at Lv70 max) |
| Core passive | After hitting with E/Q, gain the “left/right tiger tally” buff, +15% Basic Attack and lethal-counter damage for 15 seconds; with both buffs active, unlock the “tally pair” bonus of +10% damage vs Bosses for 10 seconds; permanent ATK +15% |
Alternatives (ranked by value)
| Rank | Arc | Notes |
|---|---|---|
| 1 | Fluff of Fortitude (S-rank) | Sub-stat ATK%, permanent +22% damage (+28% when enemy HP is below 50%); no buff-uptime threshold, the most reliable S-rank alternative |
| 2 | Song of the Whale (A-rank, drops from a map Boss) | ⭐ Best free alternative, ATK +20% + 20% damage vs Broken enemies, about 84% of the signature’s performance |
| 3 | Ola Ola! (A-rank 4-star) | Shop-redeemable, a stopgap for the early game |
| 4 | Blazing Flame Soul (free S-rank) | Available from the launch selection box, a pure-offense stopgap |
Gear: Fireflies & Forest 4-piece
- Top pick: Fireflies & Forest 4-piece
- 2-piece: Anima DMG +10%
- 4-piece: when nearby enemies take Anima damage, stack one layer of Crit DMG per second, up to about +56% (8 layers)
- Transitional combo: Fireflies & Forest 2-piece + Shadow Creed 2-piece (or another offensive 2-piece set)
⭐ Driver Block: Type II specialization
Hot community topic: Nanally is a Type II specialist — each Type II directly grants +6% Crit Rate, so equipping 4 easily breaks past the crit threshold.
Sample layout: II / III / IV / III, which lets you max Crit Rate even before sub-stats are built up.
Stat Priority
| Slot | Priority |
|---|---|
| Main stat | Anima DMG% > Crit DMG% > ATK% > Crit Rate% (if Crit Rate is low early on, you can run Crit Rate as the main stat first) |
| Sub-stat | Crit Rate% ≧ Crit DMG% > ATK% > DMG% |
Goal: Crit Rate 60-80%, Crit DMG 150%+ (a 1:2 ratio).
5. Recommended Teams
Wave Team (mob clearing / elemental-reaction loop) ⭐ Strongest beta setup
Nanally + Sakiri + Jiuyuan + Esper Zero
- Sakiri (Incantation): groups enemies, boosts damage, triggers an overlay reaction with Nanally (extra 20% Anima/Incantation damage)
- Jiuyuan (Anima): backline Sub-DPS output, increases Anima density
- Esper Zero (Cosmos): triggers a Synthesis reaction with Nanally, spawning Synthesis seeds for chain explosions
 Anima
Anima Nanally
Main DPS
 Incantation
 Sakiri
Buffer / Grouping
 Anima
Anima Jiuyuan
Sub DPS / Grouping
 Cosmos
 Esper Zero
Sub DPS
Boss Team (single-target burst)
Nanally + Hathor + Edgar + Sakiri
- Hathor: speeds up Q charging, shortening the Ultimate rotation
- Edgar: overlay-reaction trigger (an early-game stopgap before Sakiri)
- Sakiri: damage-boost anchor
Anima Nanally
Main DPS
 Lakshana
 Hathor
Main DPS
 Cosmos
 Edgar
Survival / Healer
Incantation Sakiri
Buffer / Grouping
Strongest Synthesis Team (high Eidolon / high investment)
Nanally + Hotori + Jiuyuan + Esper Zero
- Hotori copies Zero’s skills and maxes out the Synthesis seed cap, doubling the effect of Nanally’s passive
Anima Nanally
Main DPS
 Cosmos
 Hotori
Sub DPS
Anima Jiuyuan
Sub DPS / Grouping
Cosmos Esper Zero
Sub DPS
F2P Lineup
Nanally + Esper Zero + Haniel + Mint
- Zero, Haniel, and Mint are all free standard/gifted characters
- No top-tier damage boosts, but it can reliably clear all beta content


Rotation Example
Sakiri E (group) → Esper Zero E (trigger reaction) → Jiuyuan E (trigger Synthesis) → Nanally E + Basic Attack
→ Sakiri Q (damage boost) → Nanally Q + Basic Attack burst → finish with the Underboss joint-strike
6. Build Priority
- Ascend character level to 80 (a must-max for the Main DPS)
- Level up abilities (skills): Q Ultimate ★★★★★ → E Awoo Art ★★★★★ → Basic Attack ★★★★ → Assist ★★★
- Max-level Arc + ascend to R1 (Ready-Ready first → only consider going past 5 ascensions afterward)
- Gear main set (Fireflies & Forest 4-piece) → sub set (Shadow Creed 2-piece)
- Driver blocks: build out the Type II specialization first, with dual-crit + ATK% sub-stats
- Awakening order: A1 → A3 → A5 → A4 (or A6)
7. Pull Advice & Timing
Strongly Recommended
| Reason | Explanation |
|---|---|
| 1 | 1.0 launch T0 limited, a version-ceiling character with no rival right now |
| 2 | Strong at 0 Eidolons, anti-gravity traversal experience + fits the entire beta roster |
| 3 | High long-term value, the dedicated “Synthesis team” system can keep being strengthened later |
| 4 | Easy to play (auto-attack focused), beginner-friendly |
| 5 | High future scaling for Synthesis reactions, a core buff target for the version |
Eidolon / Signature Arc Priority
0 Eidolon + signature Arc > 1 Eidolon without signature Arc > 6 Eidolons without signature Arc
- Limited budget: single-pull for 0 Eidolons
- Chasing the ceiling: consider also going for A1 / A3
When to Pull
- 1.0 launch (2026/04/29 – 05/13) — this banner has ended / is about to end
- After that you’ll need to wait for the standard banner or a rerun Pickup (timing per official announcements)
- Right now (May 2026), if it’s still in the final stretch of the Pickup, this is the last chance
8. Community Memes / Reception
Mainstream Reception Keywords
- “Beta wheelchair”, “money-printing machine”, “most no-brainer investment” (Luoluolo)
- “Version ceiling / endgame weapon”, “T0 Synthesis-team big DPS”
- “God of anti-gravity traversal”, “wall-climbing god tool”
- “Must-pick first beginner pull”, “top pick for the 6-choose-1 selection box”
F2P Alternatives
If you don’t pull Nanally, you can switch to:
- Esper Zero + Jiuyuan + Sakiri + Mint as a stopgap
- Main DPS temporarily taken over by Jiuyuan (though power drops significantly)
- Wait for the next limited banner or a rerun
Related Guides
- Signature Weapon (Signature Arc) Complete Guide — full Ready-Ready comparison
- Gear System Complete Guide — Fireflies & Forest set breakdown
- Elemental Reaction System — Synthesis reaction, overlay reaction mechanics
- Team Building Basics — Wave / Boss team frameworks
- Best NTE Characters by Element — Synthesis T0 rankings
- NTE Voice Actor Lineup — Ayana Taketatsu’s notable roles
FAQ
Is Nanally worth pulling for? +
Strongly recommended. Reasons: (1) 1.0 launch T0 limited, a ceiling-tier character for the version; (2) strong at 0 Eidolons (anti-gravity traversal experience + fits the entire beta roster); (3) high long-term value (Synthesis team core, can be continuously strengthened later); (4) easy to play (auto-attack focused), beginner-friendly; (5) huge future scaling for Synthesis reactions. Rated by Luoluolo as the "beta wheelchair", "money-printing machine", and "most no-brainer investment".
Is 0-Eidolon Nanally enough? Should I chase Eidolons? +
0 Eidolons is already strong, but 0 Eidolon + signature Arc > 6 Eidolons without the signature Arc (community consensus). At 0 Eidolons she clears all beta content — traversal, abyss, and open world are all handled. Investment order: secure 0 Eidolons first → pull the signature Arc "Ready-Ready" → then chase Eidolons A1 + A3. Eidolon A1 (Ultimate energy recovery) + A3 (authority follow-up) are the two most core, and A6 (authority duration 12→15s) is the pick for ceiling-tier players.
How strong is the Ready-Ready signature Arc? What are the alternatives? +
Ready-Ready is Nanally's ceiling-tier weapon: base ATK 37 (R1) + dual-crit sub-stats (Crit Rate 24% at max) + three stacking bonuses (left/right tiger tally + tally pair +10% vs Bosses) + a permanent ATK +15%. Alternatives ranked by value: (1) Song of the Whale (A-rank, drops from a map Boss, free, about 84% of the signature's performance) — best free alternative; (2) Fluff of Fortitude (S-rank, no buff-uptime threshold); (3) Ola Ola! (A-rank 4-star); (4) Blazing Flame Soul (free S-rank stopgap).
Why is Nanally a Type II driver block specialist? +
Hot community topic: Nanally is a "Type II specialist". Each Type II driver block directly grants +6% Crit Rate, so equipping 4 easily pushes you past the crit threshold (60-80%). Sample layout: II / III / IV / III, which lets you max Crit Rate even before sub-stats are built up. Other Type II specialists currently include Jiuyuan and Fadia.
What if I can't get Nanally? +
Main alternative: use Esper Zero + Jiuyuan + Sakiri + Mint as a stopgap — the Main DPS role is temporarily taken over by Jiuyuan (a major drop in power, but it can run all beta content). After that, wait for the standard banner or a rerun Pickup (timing per official announcements). Once the 1.0 launch banner is missed you have to wait a while, so since this is the last chance, definitely seize it.
Nanally’s data is compiled from public sources including Game8, GameWith, Prydwen, Kaiden.gg, Mobalytics, Icy Veins, NTE Guide, AllThings.How, Sportskeeda, HN Gaming News, LDPlayer, Oslink, Bahamut, 4Gamers, Gamersky, Fandom Wiki, and others. Some follow-up multipliers and awakening names are community-compiled; the in-game values take precedence.
Related articles
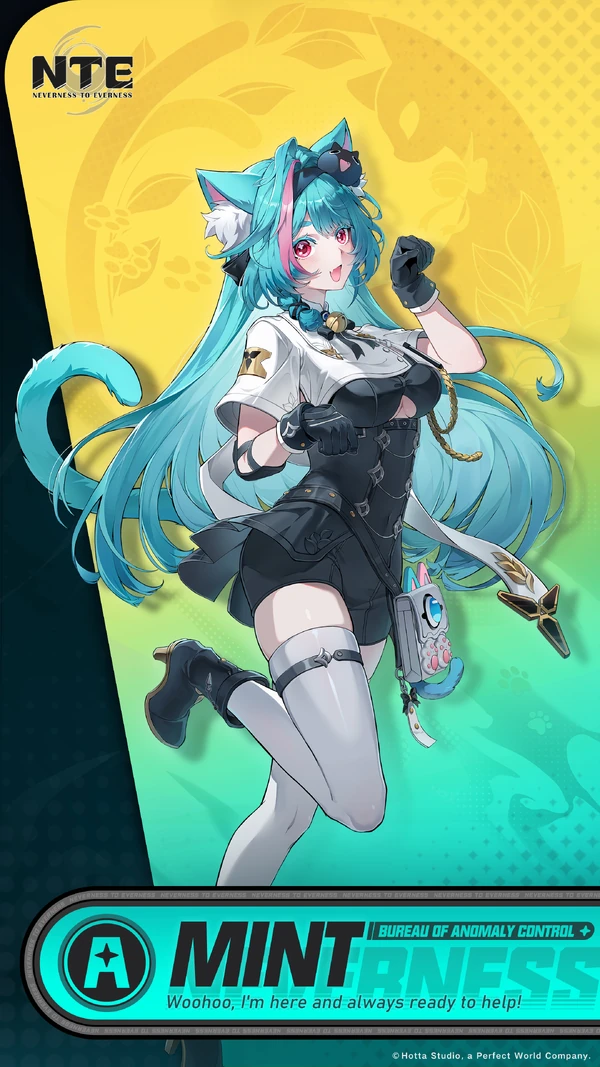
Mint Build Guide: The Free Beginner A-Rank — Skill Priority, Teams & Build Path All in One

Hotori Build Guide: 1.0 Phase 2 Limited S-Rank Sole Time-Stop Unit, Acting Outside of Time, Triple Defense Penetration