Neverness to Everness (NTE) Recommended Teams: Comps from Beginner to Advanced
A roundup of Neverness to Everness (NTE) team comps — free launch-day teams, Main-DPS-centered team templates, and dual-core comps, with team-building logic and role placement.
Published: 2026/05/20
Key takeaway: This article provides several plug-and-play Neverness to Everness (NTE) team examples — including a free + selectable S-rank team you can use immediately at launch (Aurelia / Esper Zero / Haniel + the launch-day S-rank selector), a standard team built around a single Main DPS, and a dual Main DPS fast-clear team. The two team-building principles: complete role coverage, and adjacent elements that can react.
Neverness to Everness (NTE) is a 4-character party game — so how do you put together a team that can actually fight? This article gives a few ready-to-reference team examples, plus the thinking behind building a team.
The Two Principles of Team Building
- Complete role coverage — a team is usually “Main DPS + Sub-DPS + Buffer + Healer/Survival.” First make sure roles aren’t duplicated and none are missing, then chase raw stat strength.
- Elemental reactions — letting characters of adjacent elements react with each other greatly boosts overall output.
For a more complete explanation, see Team Building Basics: Team Structure and Element Pairing.
Example 1: A Free Team You Can Use Immediately at Launch (F2P Recommended)
A free team you can assemble right at launch, built around the “S-rank selector from the launch event” paired with free characters you get automatically:
- Aurelia — Main DPS (Psyche element, A-rank, the most reliable free damage early on)
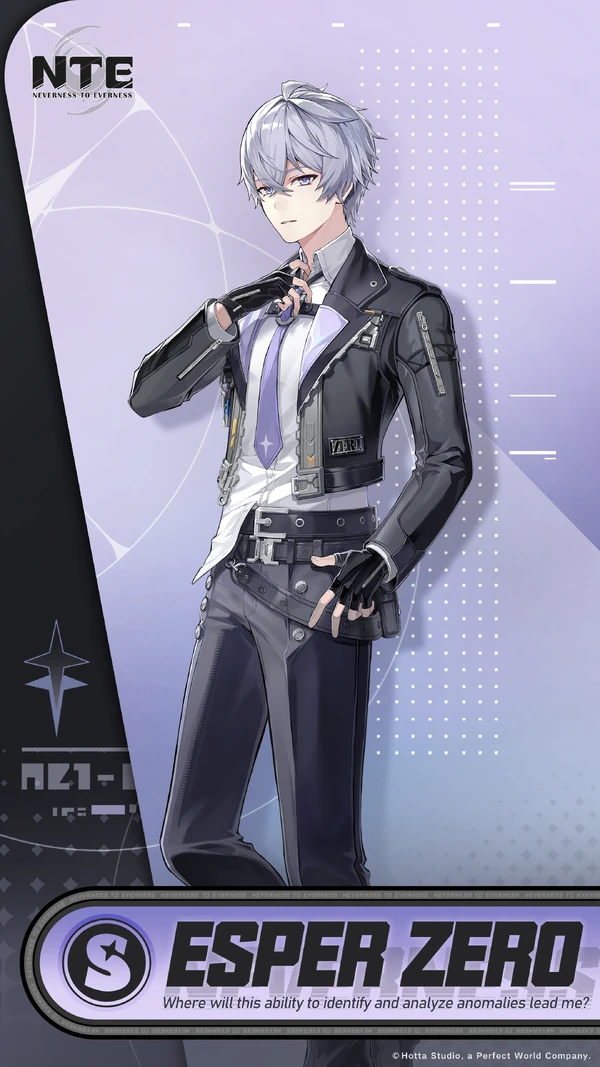
- Esper Zero — Sub-DPS / tempo setter (the protagonist you get right at the start)
- Sakiri or Jiuyuan — Buffer / Sub-DPS (chosen with the launch-day S-rank selector; Sakiri’s mob-grouping + crowd control has the highest all-around value, a beta-test general-purpose T0)
- Haniel — Healer (keeps the team going)
 Psyche
 Aurelia
Main DPS
 Cosmos
 Esper Zero
Sub DPS
 Incantation
 Sakiri
Buffer / Grouping
 Psyche
 Haniel
Buffer
This comp comes together right out of the gate and is enough for the 1.0 main story and most challenges. Once you push “Urban Tycoon” to level 18 and get Chiz, you can swap her in as Main DPS for another tier of output.
How it works: This isn’t an “elemental reaction team” — it’s a transitional comp focused on “being able to fight and not missing any role.” Aurelia (Psyche) stands on field and deals damage, Esper Zero (Cosmos) handles swap-ins to charge reactions, Sakiri (Incantation) groups mobs and adds team buffs, and Haniel (Psyche) provides sustain. Its real value is to carry you until you pull your first signature Main DPS. Once you get any of Nanally / Baicang / Hathor, you should move to the corresponding reaction team below — don’t keep running this one forever.
Common substitutes (same-role swaps that don’t break the team):
| Missing slot | Who fills in | Notes |
|---|---|---|
| Main DPS (Aurelia) | Chiz (Urban Tycoon Lv. 18) | Upgrades to a charge-team core with higher output |
| Buffer (Sakiri) | Adler | Adler provides shields, trading mob-grouping for survival |
| Healer (Haniel) | Fadia | Fadia covers the Psyche slot and can also fast-swap to charge reactions |
Common misconception: Many new players assume “the launch-day S-rank selector must go to the highest-output Main DPS.” In reality, a versatile Buffer like Sakiri is the most cost-effective pick — she’s a permanent 3rd/4th-slot member in Bloom / Burn / Dissonance teams, the widest compatibility range, whereas a self-selected output Main DPS will just get replaced by the limited Main DPS you pull later. For the full selector logic, see the Team Building Basics.
Example 2: Building Around a Main DPS
When you pull a strong S-rank Main DPS (see the Character Tier List), build the team around them as the core:
- Main DPS — your core damage; prioritize investment resources on them
- Sub-DPS — supplements damage and bridges combo chains
- Buffer — provides attack buffs to amplify the Main DPS’s damage
- Healer / Survival — keeps the team alive, especially important on high-difficulty content
The key is to make the Sub-DPS and Buffer elements react with the Main DPS as much as possible. Below are the “concrete signature teams” for the four mainstream Main DPS, listed by spending tier — just copy them directly.
The Four Signature Teams (by spending tier: F2P / Low-spender / Spender)
In the table below, “whale BiS” is the full setup when you have the limited characters, “low-spender substitute” swaps in 1–2 easily obtainable characters for slightly lower power that still works, and the “F2P version” uses entirely free/selectable characters. Elements and rarities follow this site’s character database, with exact numbers per the in-game values.
Bloom Team (Main DPS: Nanally, Anima S)
| Tier | Lineup | Notes |
|---|---|---|
| Whale BiS | Nanally + Jiuyuan + Esper Zero + Sakiri | Jiuyuan raises the flower cap to 6 blooms, Esper Zero instantly charges reactions to start things off, Sakiri groups mobs and adds buffs |
| Low-spender | Nanally + Jiuyuan + Esper Zero + Haniel | Sakiri swapped for Haniel — slightly fewer buffs, more sustain |
| F2P | Mint + Esper Zero + Skia + Adler | Use Mint (Anima) in the Main DPS slot, Skia covers the Lakshana phase, Adler provides shields |
 Anima
Anima Nanally
Main DPS
 Anima
Anima Jiuyuan
Sub DPS / Grouping
Cosmos Esper Zero
Sub DPS
Incantation Sakiri
Buffer / Grouping
How it works: Almost all of Nanally’s damage comes from the “Vita Buds” that automatically bloom on the field, so she needs to enter last and stand there doing normal attacks for a long time to snowball; the first three rotations only fill up the reaction value and stack buffs before handing off. Substitution plan: without Jiuyuan the bloom cap is lower, so you can use Mint (Anima) as a second damage dealer to maintain the Bloom line; if healing is tight, swap Sakiri for Haniel. For the swap order broken down beat by beat, see Combo Rotations.
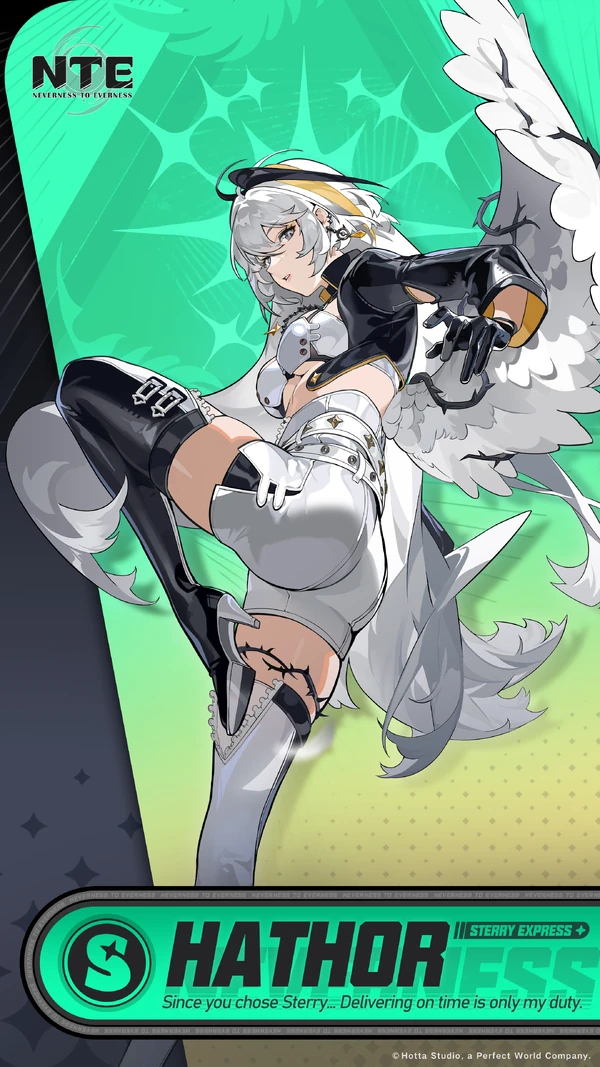
Taint Team (Main DPS: Hathor, Lakshana S)
| Tier | Lineup | Notes |
|---|---|---|
| Whale BiS | Hathor + Skia + Aurelia + Sakiri | The strongest pure damage amp of all elements (Psyche/Lakshana +50%), with a near-permanent damage-amp window |
| Low-spender | Hathor + Skia + Aurelia + Esper Zero | Sakiri swapped for Esper Zero, trading mob-grouping for steadier fast-swap reaction charging |
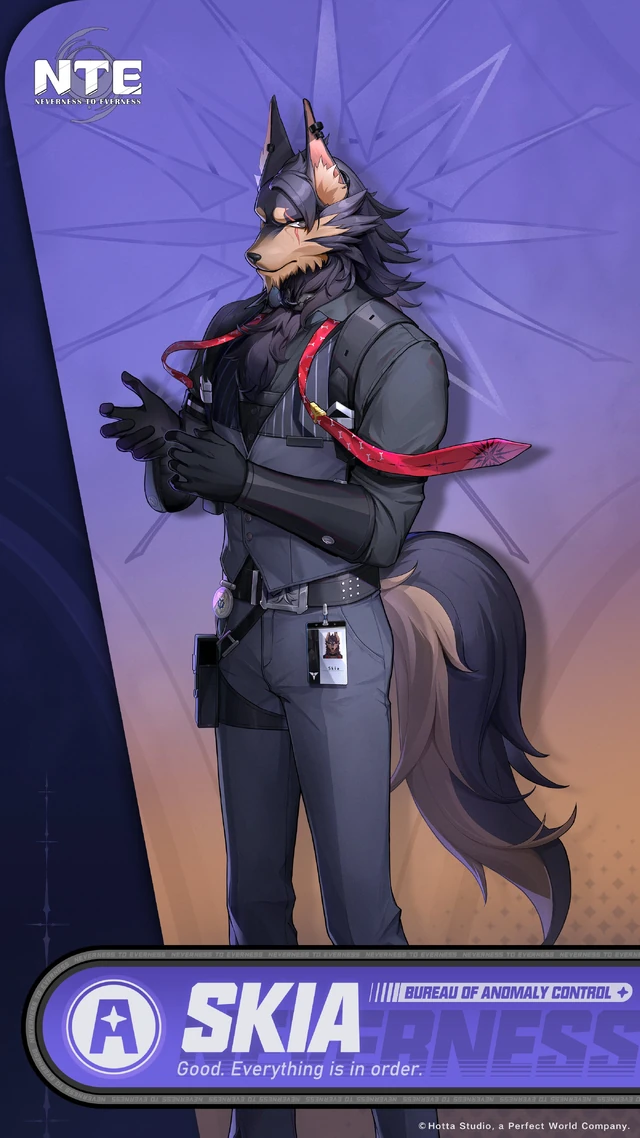
| F2P | Aurelia + Skia + Esper Zero + Adler | Aurelia covers Main DPS; Skia is the only free Lakshana character for F2P, so be sure to keep her |
 Lakshana
 Hathor
Main DPS
 Lakshana
 Skia
Sub DPS
Psyche Aurelia
Main DPS
Incantation Sakiri
Buffer / Grouping
How it works: Taint makes the target take +50% Psyche/Lakshana damage for 12 seconds, and it gets applied automatically during this team’s rotation. The 12-second window is long, so the playstyle is the opposite of the Bloom team — the focus is on keeping the Main DPS on field dealing damage rather than swapping frequently, with Esper Zero only adding a hit when the reaction value is about to run out. Substitution plan: if you don’t have Hathor, Aurelia can cover the Taint team’s on-field damage slot — she’s a Psyche element responsible for triggering Taint with adjacent-element partners and holding down on-field output; the ones that actually benefit from the +50% damage amp are the Psyche/Lakshana characters on the team (Aurelia and Skia). For the 4th slot, choose among Sakiri ↔ Esper Zero ↔ Adler based on whether you need “mob-grouping / reaction charging / survival.”
Dissonance Team (Main DPS: Baicang, Incantation S)
| Tier | Lineup | Notes |
|---|---|---|
| Whale BiS | Baicang + Daffodill + Haniel + Sakiri | The strongest stagger-breaker, built to fight high-HP bosses |
| Low-spender | Baicang + Daffodill + Haniel + Adler | Sakiri swapped for Adler, trading buffs for survival |
| F2P | ⚠️ Hard to fully assemble (no free Chaos-element character) | Daffodill and Lacrimosa are both limited, so F2P can’t run a complete Dissonance team |
 Incantation
 Baicang
Main DPS
 Chaos
Chaos Daffodill
Sub DPS
Psyche Haniel
Buffer
Incantation Sakiri
Buffer / Grouping
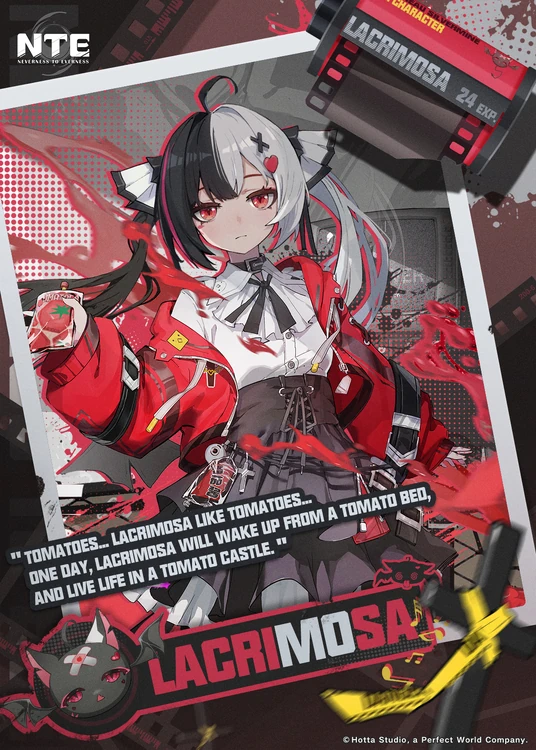
How it works: Dissonance is triggered when the target has both Burn and Detonation applied at the same time, after which it continuously reduces the stagger-break threshold. So this team’s order is fixed — first use Baicang to lay down Burn, then Daffodill charges reactions to trigger, then swap to Haniel to add Detonation; Dissonance only forms while Burn is still active, and reversing the order won’t connect. Substitution plan: free Chaos-element characters are extremely scarce, so F2P players should run Bloom / Taint first and treat Dissonance as an advanced goal for “once you have the limited characters.” ⚠️ The 1.1 Lacrimosa (Chaos S) also runs this comp; see the version update section below for her placement.
Charge Team (Main DPS: Chiz, Cosmos S)
| Tier | Lineup | Notes |
|---|---|---|
| Whale BiS | Chiz + Jiuyuan + Hathor + Fadia | Charge constantly refunds Ultimate energy, achieving “Ultimate into Ultimate” |
| Low-spender | Chiz + Jiuyuan + Skia + Fadia | Hathor swapped for Skia — slightly lower Lakshana output but the energy printing is still steady |
| F2P | Esper Zero + Skia + Mint + Adler | Chiz can be obtained for free from “Urban Tycoon Lv. 18,” then upgraded into the core |
 Cosmos
 Chiz
Main DPS
Anima Jiuyuan
Sub DPS / Grouping
Lakshana Hathor
Main DPS
 Psyche
 Fadia
Survival
How it works: Charge is a three-element reaction (forming a triangle of Cosmos / Lakshana / Psyche), and triggering it refunds Ultimate energy for the whole team. The engine is characters like Esper Zero / Fadia who “instantly charge reactions on entry” — swapping has neither cooldown nor cost, so once you’re skilled it’s almost Ultimate into Ultimate. What matters is “how smooth the rotation is and how fast energy comes back,” not single-rotation burst. Substitution plan: Fadia can stand in for Haniel and cover the slot without breaking the element line; without Hathor, use Skia to hold down the Lakshana phase + energy printing.
The step-by-step “group mobs → apply status → swap → burst” button inputs for all four teams above are broken down in Combo Rotations. This article tells you “who to put together,” while that one tells you “how to press the buttons.” For the full breakdown of each reaction’s trigger elements and F2P substitutes, see the Reaction Teams Compendium.
Example 3: Dual-Core Burst Team
If you have two damage characters on hand, you can also run “Main DPS + Sub-DPS dual-core + one Buffer + one Healer” to push both damage dealers’ output to the max. This comp demands more precise rotation execution, so we suggest trying it once you’re familiar with the game.
Concrete example: Aurelia + Hathor + Esper Zero + Sakiri — both Aurelia (Psyche) and Hathor (Lakshana) benefit from Taint’s Psyche/Lakshana +50% damage amp, their elements are adjacent and can react, Esper Zero handles weaving in reaction charging between the two Main DPS, and Sakiri groups mobs. The difficulty of this comp is that both damage dealers need to manage their Ultimate rotations, and the reaction value has to be split between the two, so we suggest first mastering the single-Main-DPS swap rhythm (see Combo Rotations) before picking it up.
When is a dual-core worth it? When you pull a second damage dealer on the same element line (for example, the Taint line already has Hathor and you then pull Aurelia), rather than letting the second damage dealer collect dust, you’re better off swapping out the Healer to build a dual-core and feeding the same buff (Taint +50%) to both of them. Conversely, if the two damage dealers’ elements aren’t adjacent and can’t react with each other, you’re usually better off honestly running a single Main DPS + one strong Buffer.
Examples by Version Update (including 1.1 Lacrimosa)
Team comps change with versions and new characters. Below are the adjustment highlights for the current version (1.1 “Dreamwander Corridor,” launched 2026/6/3):
- 1.0 Beta: The four signature teams (Bloom / Taint / Dissonance / Charge) are as above, and F2P should prioritize Bloom / Taint / Charge (free Chaos-element characters are scarce, so Dissonance is hard to assemble).
- 1.1 First Half — Lacrimosa (Chaos S Main DPS): She’s an on-field nightmare DoT Main DPS who runs the Dissonance team. Signature team Lacrimosa + Baicang + Daffodill + Haniel — Baicang lays down Burn, Daffodill and Lacrimosa stack DoT, and Haniel adds Detonation to trigger Dissonance. ⚠️ Lacrimosa leans toward “Eidolon warrior” — at 0 Eidolons with no signature Arc she feels merely average, so F2P should weigh their resources and not force-pull the limited Daffodill just for her. See the Lacrimosa Build Guide.
- 1.1 Second Half — Chaos (Lakshana S): Although her name is Chaos, she herself is a Lakshana-element character (don’t confuse her with the Chaos element’s English name), reinforcing the Taint / Charge / energy-printing systems and serving as a Lakshana-phase mainstay beyond Hathor. Her placement hasn’t been fully revealed officially yet, so go by the in-game values.
Change the version, not the skeleton: No matter what new character releases, the four-person “Main DPS + Sub-DPS + Buffer + Healer” structure and the “only adjacent elements react” principle stay the same. A new character is usually just a stronger option for one element line — swap out the old same-role character in the corresponding signature team and you’re done; you don’t need to re-level a whole team. For the latest banners and character placements, see the 1.1 Version Info and Upcoming Characters Preview.
Still Not Sure How to Build?
- Use the Team Builder to pick 4 characters, and it’ll instantly check whether your team has any role gaps.
- If you’re not sure who to level first, refer to the Character Build Priority.
- If you want to know what order to press buttons once your team is built, see Combo Rotations.
- If you want the full breakdown of “which characters form which reaction team,” see the Reaction Teams Compendium.
Frequently Asked Questions
As an NTE day-one F2P player, what free team can I build? +
We recommend the "free + selectable S-rank" team: Aurelia as Main DPS, Esper Zero as Sub-DPS/tempo setter, use the launch-day free S-rank selector to pick Sakiri or Jiuyuan as a Buffer, and Haniel as Healer. Of these, Sakiri has the highest all-around value thanks to her mob-grouping and crowd control — she's a beta-test general-purpose T0. You can assemble this comp right out of the gate, and it's enough to clear the 1.0 main story.
What are the basic principles of team building in NTE? +
Two main principles: (1) Complete role coverage — a team is usually "Main DPS + Sub-DPS + Buffer + Healer/Survival," so first make sure roles aren't duplicated and none are missing; (2) Elemental reactions — let characters of adjacent elements react with each other to greatly boost overall output. For the full concept, see the Team Building Basics.
How do I pick teammates when building around a Main DPS in NTE? +
Once you pull a strong S-rank Main DPS, build around them as the core: the Main DPS deals damage, the Sub-DPS adds damage and bridges combo chains, the Buffer provides attack buffs to amplify damage, and the Healer/Survival keeps the team alive. The key is to make the Sub-DPS and Buffer elements react with the Main DPS as much as possible.
When do I actually use a dual-core burst team in NTE? +
When you have two damage characters on hand, you can run "Main DPS + Sub-DPS dual-core + one Buffer + one Healer" to push both damage dealers' output to the max. This comp demands more precise rotation execution, so we suggest trying it once you're familiar with the game.
Team suggestions are compiled from player experience; in practice, adjust flexibly based on your character pool and the content you’re challenging.