
Neverness to Everness (NTE) Combo Rotation Guide: Reaction Loops, Swap Order & Burst Timing
Step-by-step combo rotations and DPS loops for the top Neverness to Everness (NTE) teams — Bloom, Stain, Chaos Discord and Charge fast-swap squads: grouping enemies, applying states, swap order and burst timing fully broken down.
Published: 2026/05/31
Key takeaway: Every signature team’s combo shares one skeleton —group enemies → apply DoT/mark → charge the reaction gauge (Esper Zero / Fadia fastest) → swap to Main DPS to detonate → unload the burst after stagger. They only differ in “what to apply and who goes first”: Bloom = Esper Zero opens by instantly charging, then hands off to Nanally to drop petals; Discord = Baicang lays Scorch → Haniel adds Nova to trigger it; Stain = the Main DPS stays on-field soaking a +50% buff, and Esper Zero only chips in when the gauge needs a reset; Charge = Jiuyuan lays marks first, then fast-swap units chain reactions to restore energy and ult the moment energy fills. The swap IS the moment you detonate the reaction — the instant a portrait lights up, swap.
The Reaction Teams Compendium covers “which characters form which reaction team”, and the Combat System guide covers “how parry / stagger / Lakshana break work”. This article covers just one thing: once you have a team, what order your fingers should press. It breaks the “group → apply states → swap → burst” loop of the major signature teams into step-by-step drills you can follow.
ℹ Reading prerequisites: This article uses this site’s terminology (co-attack skill = E, ultimate finisher = ult = Q, support skill = swap-in entry skill, elemental-reaction gauge = swap energy bar, Lakshana break = stagger). Reaction mechanics theory and character building aren’t repeated here — follow the inline links when needed. Exact hit counts / frame data vary slightly between sources, so always defer to in-game behavior.
Universal Loop Logic (the skeleton every team shares)
No matter which team you run, the combo follows the same main line. Memorize these 5 beats and you can apply them to every team:
| Beat | Action | Done by |
|---|---|---|
| 1 Group | Pull enemies into one cluster so reactions / placement petals land in full | Support / crowd control (Sakiri, Hotori, Jiuyuan) |
| 2 Apply states | Lay down DoTs, marks or pre-reaction setups (Scorch, Nova, Sucker, placement petals) | Sub-DPS / stagger unit (Daffodill, Jiuyuan) |
| 3 Charge | Fill the elemental-reaction gauge, ready to detonate | Charge unit (Esper Zero, Fadia fastest) |
| 4 Swap to Main DPS to detonate | The swap = cash in the gauge + trigger the reaction | Main DPS enters |
| 5 Burst after stagger | Push to stagger (Lakshana break) → whole team unloads ultimates | Whole team |
A few iron rules that run through everything:
- The swap IS the act of “detonating the reaction”. A character’s portrait lighting up with a glowing ring = gauge full; swap as soon as you see it, don’t hoard and grind slowly.
- The Main DPS usually enters “last”. The earlier units handle grouping, applying states, and charging to set the stage; the Main DPS comes in to soak every buff and harvest.
- Always save ultimates until after stagger (Lakshana break). Damage done before stagger has no buff window — twice the effort, half the result.
- See a circle, parry it (grinds the most stagger + instantly fills the gauge); this hit often lets you skip “Beat 3 charge” entirely. Parry details are in the Combat System guide.
- E-swap timing overlap: the instant you fire the co-attack skill (E), immediately swap — the original character stays on-field to finish the E’s follow-up damage, so the two characters’ actions overlap. This is the shared advanced tech every fast-swap team uses to push DPS higher.
Below, each signature team only describes “where it differs from the universal skeleton” plus the actual button order. For element lines and character roles in depth, cross-reference the Reaction Teams Compendium.
Bloom Team (Nanally): Esper Zero opens by charging → hands off to drop petals and harvest
Core idea: Nanally’s damage comes from the on-field “Vita Buds” auto-spawning petals, so she needs to enter last and stay on-field a long time, continuously triggering petals with basic attacks; the earlier units fill the gauge and stack buffs before handing off to her.
 Anima
Anima Nanally
Main DPS
 Anima
Anima Jiuyuan
Sub DPS / Grouping
 Cosmos
 Esper Zero
Sub DPS
 Incantation
 Sakiri
Buffer / Grouping
Standard swap order (max-damage sequence):
- Haniel / Sub-buffer: co-attack (E) → ultimate (Q), to lay a layer of team buff and gauge first.
- Sakiri: hold co-attack (E) to group enemies → ultimate (Q), pulling enemies into one cluster and adding an ATK buff.
- Esper Zero: co-attack (E) → ultimate (Q). Esper Zero fills the gauge almost instantly on entry; the moment her ult ends she hands off. She’s this team’s “starter”.
- Swap to Nanally: enter (support skill) to detonate the reactions accumulated earlier → ultimate (Q) → co-attack (E) → basic-attack spam. Nanally now holds the field, continuously generating petals via basic attacks to snowball.
Advanced (Hex optimization): If Sakiri’s gauge is already full by Beat 3, you can swap to Sakiri first to detonate Hex (making the target’s next reaction take an extra +20% of past damage), then swap to Nanally to harvest for an even bigger burst. Nanally’s basic-attack hit counts and petal cap should be confirmed in-game.
Also in the “Cosmos fast-swap starter” category is Hotori: the rotation is Hotori co-attack (E) to open → Jiuyuan co-attack (E) to group → Esper Zero co-attack (E) to charge → swap to Nanally at the very last second (because Nanally’s support skill covers the gap, letting Hotori dump petal damage to the max during the time-stop) → wait roughly 15 seconds for teammates’ co-attacks to come back up → repeat a cycle → then fire Hotori’s ult. This takes “Main DPS enters last” to the extreme.
Chaos Discord Team (Baicang): you MUST “Scorch first, then Nova” to link it
Core idea: Discord triggers only when the target has BOTH Scorch + Nova on it at the same time. So this team’s combo order is fixed — you must apply Scorch first and, while it hasn’t expired, add Nova on top; only then does Discord pop and grind the stagger break. Reverse the order and you can’t link it.
 Incantation
 Baicang
Main DPS
 Chaos
Chaos Daffodill
Sub DPS
 Psyche
 Haniel
Buffer
Incantation Sakiri
Buffer / Grouping
Standard swap order:
- Baicang: fire her own skills first to apply Scorch; her basic-attack process generates “Mantra” to add a second layer of Scorch, stabilizing the DoT stacks.
- Daffodill: swap in to charge, detonating and triggering the Scorch reaction (Daffodill runs entirely on high-frequency swap-ins and is this team’s stagger-break engine).
- Swap to Haniel: once Daffodill’s gauge is full, swap to Haniel to add Nova.
- Trigger Discord: if Scorch is still on the target now, Nova + Scorch = Discord active, which begins continuously lowering the stagger cap (stackable, dropping the stagger-break threshold by up to about 30% — values defer to in-game), spiking stagger-break speed.
- Swap back to Daffodill: keep swapping in at high frequency to grind the stagger break, pushing the enemy toward stagger.
- Stagger window: whole team unloads ultimates for the burst.
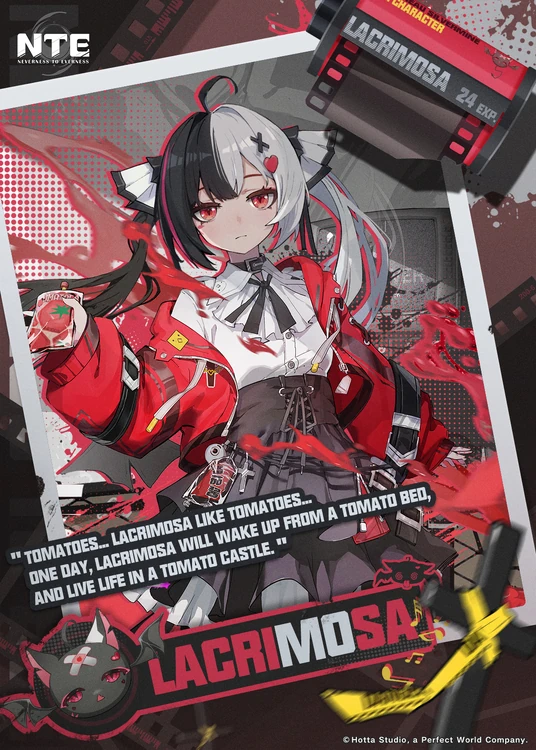
Execution note: Daffodill is an “off-field stagger unit” — keep her off-field to let the Main DPS accumulate the gauge; every time a teammate uses a support skill she stacks “Resonance”, upgrading her co-attack skill to a stronger version. Her parry (via phantom step or a support skill) instantly refills her ult, so once you’re practiced you can form an “ult → phantom step → ult again” loop. Patch 1.1 Lacrimosa also slots into this Discord team; for her role and substitutions see the Reaction Teams Compendium.
Stain Team (Hathor / Skia): Main DPS on-field is king, the charge unit only chips in
Core idea: Stain = the target takes +50% Psyche / Lakshana damage for 12 seconds, and in this team it gets applied automatically during the loop, no special input needed. The 12-second window is long — effectively a near-permanent damage buff. So the rotation is the opposite of the previous two — the point isn’t frequent swapping, but keeping the Main DPS on-field dealing damage to soak that +50% in full.
 Lakshana
 Hathor
Main DPS
 Lakshana
 Skia
Sub DPS
 Psyche
 Aurelia
Main DPS
Incantation Sakiri
Buffer / Grouping
Standard rotation (with Skia / Hathor as Main DPS):
- Sakiri / crowd-control opener: use Sakiri’s crowd control to group and suppress enemies, ensuring the Main DPS’s damage isn’t interrupted.
- Main DPS on-field: let Skia (or Hathor) deal damage continuously on-field; Stain triggers automatically during the loop, sustaining the +50% Psyche / Lakshana damage window.
- Esper Zero only chips in when a “reset” is needed: use Esper Zero’s co-attack (E) to top off the charge when the gauge needs a reset, incidentally triggering Sucker / Charge to keep the rhythm locked — don’t swap just for the sake of swapping, or you’ll interrupt the Main DPS’s on-field damage.
- Aurelia as second damage / Sub-DPS: holding dodge lets her move while firing “jellyfish bolts”, and after her co-attack she enters an empowered state (Cadenza) that boosts jellyfish-bolt damage — good for filling damage in the Main DPS’s downtime.
- After stagger: as usual, save ultimates for the stagger window and pour them in together.
Execution note: The essence of a Stain team is “swap less, stay on-field longer”. Treat Esper Zero / Fadia as a “press once when the gauge is nearly out” supply station, not the main melody. Skia is the only free Lakshana character for F2P (0-copy) and the core of the Stain line — be sure to keep her.
Charge Fast-Swap Team (Chiz): “ult after ult” via Esper Zero / Fadia’s instant charge
Core idea: Charge is a tri-elemental reaction that, when triggered, restores ultimate energy for the whole team. This team’s goal is to keep Charge triggering and farm energy into “ult after ult”. The engine is Esper Zero / Fadia — characters who “instantly fill the elemental-reaction gauge on entry” — and since swapping has no cooldown and no cost, the loop gets very fast once practiced.
 Cosmos
 Chiz
Main DPS
Anima Jiuyuan
Sub DPS / Grouping
Lakshana Hathor
Main DPS
 Psyche
 Fadia
Survival
Standard swap order:
- Jiuyuan enters first to lay marks / placement petals: Jiuyuan goes in first to apply marks and placement petals, setting a base for the following reactions (she keeps dealing damage even after leaving the field).
- Fast-swap charge units chain reactions: use Esper Zero / Fadia to swap in at high frequency, chaining the Sucker → Bloom → Charge tri-elemental chain; every Charge hit restores energy. Fadia can also redirect damage away from teammates while charging quickly, subbing for Haniel without breaking the element line.
- Once energy is full, swap to the Main DPS to ult: when energy is farmed up, swap to Chiz (or the Main DPS) to use the ult, which itself pushes the stagger break and the next round of Charge.
- Repeat: because swapping is free, once practiced it’s almost “use the ult, chain a few reactions, and you can fire another one”.
Execution note: A Charge team competes on “how smooth the loop is and how fast energy comes back”, not single-hit burst. Treat Esper Zero / Fadia’s co-attack as a metronome and swap the instant a portrait lights up, keeping the Charge tri-elemental reaction cashing in. For element-line details (forming the Cosmos / Lakshana / Psyche triangle) see the Reaction Teams Compendium.
The Order to Practice (for newcomers)
- First, just practice “telling circles from crosses”: parry circles, dodge crosses. One parry = instantly full gauge + the most stagger ground down, letting you skip the “charge” beat entirely. (Details in the Combat System guide)
- Then practice the “swap the instant a portrait lights up” reflex: making “gauge full → swap to detonate” muscle memory is the foundation of every fast-swap team.
- Only last, chase the “E-swap action overlap”: swapping the instant you fire E to overlap actions is an advanced tech that pushes DPS even higher — no need to force it from the start.
- Not sure how to build a team? Head back to Team Building Basics and the Reaction Teams Compendium to assemble the roster first, then come back and drill the combos here.
Related Guides
- Full Reaction Teams Compendium — which characters form which reaction team, and F2P (0-copy) substitutions
- Complete Combat System Breakdown — parry / stagger / Lakshana break / swap mechanics
- Team Building Basics — team structure and element-pairing fundamentals
- Elemental Reaction System Explained — the 6 elements and reaction-trigger principles
- Individual character build guides (Nanally / Baicang / Hathor / Chiz, etc.)
FAQ
What order do you actually press buttons in for NTE combos? +
The universal skeleton is group enemies → Sub-DPS / stagger unit applies a DoT or mark → charge unit (Esper Zero / Fadia) fills the elemental-reaction gauge → swap to the Main DPS to detonate the reaction → push to stagger (Lakshana break) then unload ultimates for the burst. The key point: the swap itself IS the act of "cashing in the elemental-reaction gauge and detonating the reaction", so the moment a portrait lights up, look for a chance to swap — don't hoard it. Teams only differ in "which state to apply, and who goes first"; the Main DPS is always the last one in, soaking up every buff.
What's the swap order for the Bloom (Nanally) team? +
A common max-damage sequence: Haniel co-attack→ult → Sakiri (hold co-attack)→ult → Esper Zero co-attack→ult (instantly tops off the elemental-reaction gauge) → swap to Nanally ult→co-attack→basic-attack spam. Esper Zero's job is to "enter the field, instantly charge the gauge + use her ult", then pass the baton; Nanally is saved for last to soak up every buff and trigger her petal follow-ups via basic attacks. If Sakiri's gauge is already full, you can swap to Sakiri first to apply Hex (the next reaction deals an extra +20% damage) before swapping to Nanally to harvest. Exact hit counts should be confirmed in-game.
Why does the Chaos Discord (Baicang) team have to apply Scorch first, then Nova? +
Because Discord only triggers when the target has BOTH Scorch + Nova on it at the same time, and once triggered it continuously lowers the stagger cap and massively speeds up the stagger break. So the rotation is fixed: Baicang fires her skills first to apply Scorch → Daffodill charges and triggers Scorch → swap to Haniel to add Nova → with Scorch still on the target, Discord triggers → swap back to Daffodill to keep grinding the stagger break down. Reverse the order (Nova before Scorch) and you can't link into Discord.
How does a Charge fast-swap team manage to "ult after ult"? +
A Charge team relies on Esper Zero / Fadia — characters who "instantly fill the elemental-reaction gauge on entry" — so the Charge tri-elemental reaction keeps triggering and restores ultimate energy for the whole team. The rotation: Jiuyuan enters first to lay down placement petals / marks → fast-swap charge units chain Sucker → Bloom → Charge → once energy is full, swap to Chiz / Main DPS for the ult → repeat. Because swapping has no cooldown and no cost, once you're practiced it's almost "ult into ult". Fadia can sub for Haniel to fill the Psyche slot without breaking the element line.
Combo rotations are compiled from 4Gamers, Kaiden.gg, ZeroLuck, Mobalytics, Game8, Bahamut, LDPlayer and other public sources plus community practice. Exact hit counts / frame data / stagger-break percentages vary slightly between sources, so always defer to in-game behavior; swap order and reaction prerequisites (e.g. Discord needing Scorch + Nova) are highly consistent across sources. Patch 1.1 Lacrimosa is a preview.