Sea Prisoner / Deep Blue Sorrow Full Guide: Song of the Whale Arc, Anima Weakness, Drive a Car Through Nautili Tunnel to Trigger
Neverness to Everness (NTE) Sea Prisoner / Deep Blue Sorrow full guide — Anima weakness (no resistance), drive a four-wheel car through the Nautili Tunnel to trigger, two-phase move list, parry the charging horn for a long stun, Blossom team, guaranteed first-clear Song of the Whale (Aurelia BiS S-rank Arc).
Published: 2026/05/25
Key answer: Sea Prisoner / Deep Blue Sorrow is the giant-whale Anomaly in the waters of the New Herland District, weak to Anima (no resistance). Trigger: drive a four-wheel car through the Nautili Tunnel (west to east) (motorcycle doesn’t work — the number-one wall). The charging horn can be parried for a long stun. Guaranteed first-clear Song of the Whale S-rank Arc (Plasma, Aurelia BiS). Blossom team BiS: Nanally + Esper Zero + Hathor + Fadia.
ℹ Note: The commission name is confirmed as “Deep Blue Sorrow.” The Boss’s Anima weakness ≠ the Song of the Whale Arc element (Plasma) — don’t mix them up.
A giant whale-shaped ocean Anomaly with a single horn on its brow — Sea Prisoner drops “Song of the Whale,” Aurelia’s best-in-slot Plasma S-rank Arc, but its trigger condition is one of the most-overlooked in the whole game. This article lays out the trigger, moves, parries, and Blossom team in one place.
1. What is Sea Prisoner
| Item | Details |
|---|---|
| Boss name | Sea Prisoner / Deep Blue Sorrow |
| Anomaly commission name | Deep Blue Sorrow |
| Type | Major world Boss / Anomaly commission, four-star commission |
| Appearance theme | Giant whale-shaped ocean Anomaly with a single horn on its brow (the charging horn); ocean / imprisonment theme |
Location: the waters of the New Herland District (in Hethereau City). After unlocking, the Boss’s permanent respawn point is east of Cape Square, and you can re-challenge it any time. The trigger location is the Nautili Tunnel (an undersea tunnel) connecting Bridge Crossings and the New Herland District.
2. Unlock / Trigger Conditions (the hardest part of this commission)
Hard requirements (consistent across all sources)
- ⚠️ You must be driving a four-wheel car — a motorcycle / scooter does NOT work, the blue Anomaly portal will not spawn (the most-overlooked mechanic in the entire game, the number-one wall)
- Route: teleport to the Wetheimer Tower in Bridge Crossings → drive into the Nautili Tunnel, heading toward New Herland (west to east)
- As you drive, a glowing blue spacetime portal + an “Anomalous Realm” prompt appears ahead → do NOT stop the car, keep driving → water-ripple VFX → an ice-field road surface → drive into the arena and the fight begins
Community trigger tips (try one, defer to in-game)
| Detail | English community | Chinese community |
|---|---|---|
| Entry method | Reverse / back in, front of car facing east | Hug the left lane the whole way |
| Time of day | Mostly no limit mentioned | Only at night, around 20:00-04:00 (won’t trigger in daytime) |
The confirmed core: four-wheel car + go through the Nautili Tunnel west to east + don’t stop when you see the blue portal. The three trigger tips are listed as “community-reported tricks; the actual in-game version is authoritative.”
Recommended level: Lv 38+, bringing a healer is advised.
3. Element & Weakness
- Weakness: Anima — use Anima-element characters to stagger efficiently and shred its HP fast
- Resistance: None listed
4. Move List (Complete)
Overall rhythm: it’s huge, its actions are on the slow side, and almost every move has a red-light warning. Core principle: dodge the red light, parry the charge.
Phase 1 (about 100%-70% HP)
| Move | Counterplay |
|---|---|
| Diving slam / breaching wave | Watch the red light and dodge |
| Geyser | Move out of the way |
| Homing projectiles / water-ball barrage | Dodge roll |
| Aerial dive | Watch the red light and roll |
Phase 2 (below 70% HP, the arena rains and the attacks get wilder)
| Move | Counterplay |
|---|---|
| Geyser + whirlpool | A warning red circle appears on the ground; the moment it shows, move out immediately |
| Anchor | Throws a bright-red anchor in a straight line from above; can be parried / countered |
| Tsunami red waves | Multiple red tsunamis push forward; dodge only (i-frames of the roll) |
| Diving thrust / charge (signature) | Flies up then dives with the horn; can be parried → long stun |
Parryable vs Dodge-only (key)
| Move | Handling |
|---|---|
| Diving thrust / charging horn | ✅ Parryable → triggers a long stun (very wide parry window; stay calm and wait for it to close in before blocking; the biggest damage window of the fight) |
| Anchor | ✅ Parryable / counterable (use a Rail Counter / Ultimate / normal attack) |
| Tsunami red waves | ❌ Dodge only (i-frames of the roll, do NOT run the opposite way) |
| Geyser / whirlpool (red circle) | ❌ Move out of the circles only |
| Homing projectiles, dive | ❌ Mainly dodge |
Phase thresholds: the English mainstream uses a single 70% threshold; some Chinese guides use three phases (100-60% / 60-30% / enraged below 30%). Defer to in-game.
5. Drop Rewards
First-Clear Core: Song of the Whale
- Rarity / Element: S-rank Plasma Arc (⚠️ the Boss is weak to Anima, but this reward Arc is Plasma — don’t mix them up)
- Effect (“Deep Blue Sorrow”): ATK +12% (+24% at max level), +12% damage to staggered enemies, restores 30% HP when you defeat a staggered enemy (at most once every 30 seconds) — a hybrid attack + survival (lifesteal) type
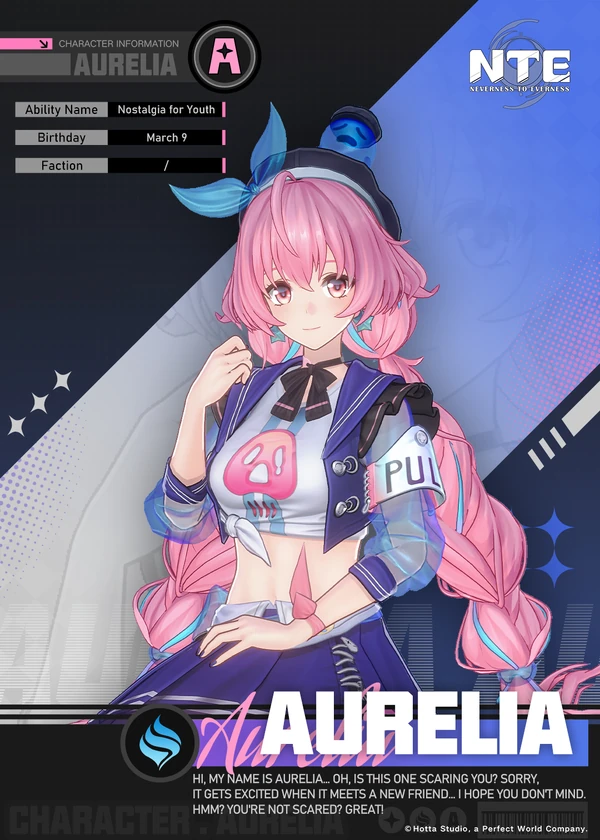
- Best character: Aurelia — the signature pairing; she reliably drives enemies into the staggered state
For full Arc details, see the Aurelia Full Build Guide.
Other Drops / Commission Rewards
- Tear of the Sea — a quest-designated material (repeatably obtainable)
- Hunter EXP 300, Crystals 40, Fons 15,000, Silver Vine 80, U-00NE 30, Beetle Coins 7,500, Anomaly Material Selection Box I × 5
- Arcane Thread / Runic Thread
Weekly re-runs: the first clear grants Song of the Whale (one-time); after that, re-runs mainly produce materials (Tear of the Sea, threads, Beetle Coins, Hunter EXP). The exact weekly cap is authoritative in-game.
6. Recommended Teams (Anima Weakness)
GameWith Recommended “Blossom Team” ⭐
Nanally (Anima Main DPS) + Esper Zero (Cosmos) + Hathor (Lakshana) + Fadia (Survival / Healer)


Nanally Hypercarry
Nanally (Main DPS) + Skia (Sub-DPS) + Mint (Buffer) + Chiz


Hathor Charge Team
Hathor (Main DPS) + Jiuyuan / Mint (Sub-DPS) + Edgar (Buffer)
 Lakshana
 Hathor
Main DPS
 Anima
Anima Jiuyuan
Sub DPS / Grouping
 Cosmos
 Edgar
Survival / Healer
 Psyche
 Fadia
Survival
Team-building rule: prioritize Anima-element damage (Nanally, Jiuyuan) to exploit the weakness and stagger fast; pair with one healer / survival unit (Fadia / Sakiri) to handle the full-screen red circles, water explosions, and tsunamis in Phase 2.
7. Combat Tips + Common Beginner Mistakes
Reliable Triggering (most critical)
- First make sure you have a four-wheel car (if not, go get / summon one)
- Teleport to the Wetheimer Tower in Bridge Crossings, drive toward New Herland through the Nautili Tunnel (west to east)
- (Community tips, try one) night 20:00-04:00 / hug the left lane / reverse in with the front of the car facing east
- When you see the blue portal, do NOT stop the car — keep driving across the water → ice field → into the arena
Two-Phase Strategy
- Phase 1 (>70%): calmly watch the red light and dodge, focus-fire with Anima to stagger. Always parry the charging horn → one success buys a long weakened-state damage window (the biggest DPS in the fight)
- Phase 2 (below 70%): the arena rains and the rhythm gets chaotic. Move out of the ground red circles, eat the tsunamis with roll i-frames, counter the anchor with a Rail Counter / Ultimate / normal attack, and keep parrying the charge
Common Beginner Mistakes
| ❌ Mistake | Consequence |
|---|---|
| Riding a motorcycle / going on foot to trigger | The portal never appears (the number-one mistake) |
| Stopping / getting out when you see the portal | The trigger is interrupted — you must keep driving the whole way |
| Running the opposite way from a tsunami | You eat full damage instead; stay put and dodge with i-frames |
| Mindlessly dodging the charge | Wastes the biggest damage window from parry-stunning it |
| Giving Song of the Whale to an Anima character | The Boss is weak to Anima, but Song of the Whale is a Plasma Arc, best on Aurelia |
| Tanking the full-screen red circles without a healer | You die easily — bring Fadia / Sakiri |
8. Related Guides
- Anomaly Boss Full Bestiary — overview of all 18 Bosses
- Serenetti / Mammon / Headless Rider / Beat King / Nestbound Bird / Black Tome / Arachne / Swallowtail / Morphix — other popular Bosses
- Aurelia Full Build Guide — Song of the Whale’s best owner
- Vehicles Full Guide — how to get a four-wheel car
- Elemental Reaction System — the Blossom reaction
FAQ
How do you trigger Deep Blue Sorrow? Why can I never get it to trigger? +
The number-one mistake is not driving a car! Hard requirement: you must be driving a four-wheel car (motorcycle / scooter does NOT work). Drive from the Wetheimer Tower in Bridge Crossings toward New Herland and go through the Nautili Tunnel (west to east) → a blue spacetime portal + an "Anomalous Realm" prompt appears ahead → do NOT stop the car, keep driving across the water → ice field → enter the arena and the fight begins. Community trigger tips (try one, defer to in-game): at night, 20:00-04:00, hug the left lane, or reverse in with the front of the car facing east. Recommended Lv 38+.
How do you get the Song of the Whale Arc and who is it for? +
Guaranteed first-clear drop. An S-rank Plasma Arc — ATK +12% (+24% at max level), +12% damage to staggered enemies, and restores 30% HP when you defeat a staggered enemy (once every 30 seconds). Best character: Aurelia — her kit reliably drives enemies into the staggered state, keeping the damage bonus and the healing rolling. ⚠️ Note: the Boss is weak to Anima, but Song of the Whale is a Plasma-element Arc — don't force it onto an Anima character just because you exploited the Anima weakness.
Which of Sea Prisoner's moves can be parried? +
Core principle: dodge the red light, parry the charge. Parryable: the diving thrust / charging horn (its signature move — a very wide parry window; a successful parry triggers a long stun = the biggest damage window), the anchor (counter it with a Rail Counter / Ultimate / normal attack when it lands close). Dodge only: the tsunami red waves (eat them with the i-frames of your dodge roll, do NOT run the opposite way), geysers / whirlpools (move out of the red circles), and homing projectiles.
How many phases does Sea Prisoner have? +
The mainstream view is a single 70% threshold into Phase 2 (some Chinese guides further split off an enraged finish below 30% — defer to in-game). Phase 1 (above 70%): diving slam, geysers, homing water bullets, aerial dive — calmly dodge the red light and parry the charge. Phase 2 (below 70%): the arena starts raining and the rhythm gets chaotic, adding the anchor, tsunami red waves, and geyser + whirlpool — be sure to bring a healer to handle the full-screen red circles.
What team should you bring against Sea Prisoner? +
Weak to Anima, with no resistance. GameWith Blossom team: Nanally (Anima Main DPS) + Esper Zero + Hathor + Fadia (Survival). Nanally Hypercarry: Nanally + Skia + Mint + Chiz. Team-building rule: prioritize Anima-element damage dealers (Nanally, Jiuyuan) for fast staggering + one healer (Fadia / Sakiri) to handle the full-screen water explosions in Phase 2.
Sea Prisoner data compiled from public sources including Game8, GameWith, GameRant, GAMES.GG, ZeroLuck, AllThings.How, Sportskeeda, Nerdschalk, Icy Veins, Entertainment Taxi, LDPlayer, 4Gamers, and Bahamut. Trigger details (reversing vs night + left lane), the commission name, the phase thresholds (70% vs 60%/30%), and the weekly reward cap should follow in-game.
Related articles
The Never-Ending Arachne Complete Guide: Eternal Waltz Arc, Chaos Weakness, Dark Room Light Circle Mechanic, Discord Team
Beat King / Sonic Tyrant Complete Guide: Blow Up the Crowd Arc, Rhythm-Battle Mechanic & Psyche Element Strategy